Friday, June 28, 2013

Creating Your Own Sub-Irrigated Planter (SIP) - An Update

I just wanted to post a quick update of the progress of my homemade Sub-Irrigated Planter (SIP).


Less than a month in, things seem to be progressing nicely!

Wednesday, June 12, 2013

Creating Your Own Sub-Irrigated Planter (SIP)

Presently, I have 7 Earthbox Planters which I'm very happy with. I am however always looking for a little bit more growspace and decided to try my hand at a home made Sub-Irrigated Planter (SIP). Pretty much everything used to make this planter was something I either had laying around or something I was able to bum off of a Facebook friend.

As I mentioned in an earlier post, all SIPs feature a reservoir chamber at the bottom of the planter that is filled with water through a tube, plastic pipe or other opening. The water is then soaks or wicks upward into the soil through capillary action. The chamber features an overflow hole which prevents over-watering making the planter pretty much fool proof. As long as you fill the reservoir full each day then it is practically impossible to over or under water your plants.

I used regular old 5 gallon buckets to act as the planter itself. One holds the growing medium and stacks inside the other. The void in the bottom of the exterior bucket acts as the reservoir and a piece of PVC pipe acts as the fill tube. A small plastic bowl (a used sour cream container works great) will hold the growing medium in the reservoir and a simple kitchen trash bag will act as our mulch cover.

Complete Materials List

  • 2 five gallon buckets
  • Pipe or tube for fill tube (I used 1 1/2" PVC pipe which allows a garden hose to inserted for easy filling)
  • Small plastic bowl (sour cream container sized)
  • Growing medium (medium to large bag)
  • Kitchen sized trash bag
  • Drill with 1/4" bit and 1 1/2" hole saw
  • Rotary tool
  • Circular saw (to cut PVC pipe to length if needed) 
  • String
  • Bolt cutters (to cut bucket handles off)
  • Scissors
  • Permanent Marker
  • Additional fertilizer (Optional - I used Jobes Organics Granular Fertilizer For Vegetables & Tomatoes 2-7-4)  


Start by making sure your buckets are clean and ready for planting. Cut the handles off the buckets and then stack one inside the other. Measure how much of the top bucket sticks out of the the bottom and then trim your plastic bowl to that height. Place the cut bowl on the bottom of what will be your interior bucket and trace an outline.


Use the rotary tool to cut a circle out for your small bowl. Use a 1/4" bit to drill approximately 25 around your larger center hold and finally, use a 1 1/2" hole saw to drill a space for your fill tube.


Cut four slits in your small plastic bowl to allow water to penetrate into your growing medium and wick upward.


Drill four 1/4" holes in bottom of your fill tube to allow water to enter the reservoir. 


Drill three or so holes in your exterior bucket slightly shorter than the height of your plastic bowl. These holes will as act your overflow hole.


Stack your two buckets one inside the other and position your plastic bowl and fill tube. Your plastic bowl should fit snugly in the bottom hole as should your fill tube.


 Add moist growing medium to the bottom of your bucket and pack it in tightly into your small bowl. Continue filling your bucket until it is around 2/3 of the way full.


If you're using an additional fertilizer, add now per manufacturer's instructions. I used  Jobes Organics Granular Fertilizer For Vegetables & Tomatoes 2-7-4.


Finish filling your planter until you have about a 1/2 to 1" mound on top. Cover with a kitchen sized trash bag (cut small hole to fit over fill tube) and then use string to tie cover tight. Trim excess bag/mulch cover with scissors.


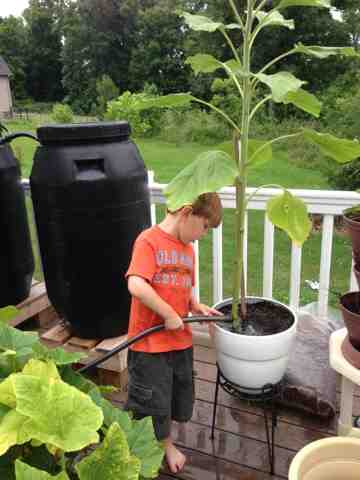
Cut a X in the center of your mulch cover and carefully plant your seedling in the center of the planter. Water the seedling from the top this first time. Go ahead and add water to the reservoir through the fill tube until it comes out of the overflow holes. This is the only time you should need to water your planter from the top as water will constantly sock upward into the planter from the reservoir. During the heat of the summer you will want to check the water level daily. Just add water until water comes out of the overflow holes. With this type of sub-irrigated planter it is impossible to overwater.


I've chosen a Yellow Pear Tomato for this specific planter. I'll post updates as to its progress. Thanks for reading! 

Thursday, June 6, 2013

Back Porch Gardening - With A Little Help


I try to involve family as much as I can in my back porch ventures. My son especially enjoys helping me water the planters.


I've found the best way to involve him is by letting him help choose the types of plants we grow. He's not the biggest tomato fan but he loves strawberries and at the moment, we're up to 20 Some strawberry plants spread across 4 different planters. His favorite this season however is our giant sunflower. I never knew sunflowers could grow in containers but as you can see from the picture below, things seem to be going well.


Saturday, June 1, 2013

Back Porch Gardening Upclose

If I haven't mentioned it already, I'm an avid photographer. My camera of choice is a Nikon D7000. I'm always taking pictures of my kids, plants, back porch, yard, pond and pretty much anything else I can.

I wanted to take some interesting shots of my garden and decided to use my  100mm macro Lens manufactured by Tokina. For those of you who are unaware, a macro lens (sometimes also referred to as micro) is used to take extreme close ups. In the case of this Tokina, it is capable of up to a 1:1 macro ratio meaning the size of the impression on the sensor (or film back in the day) is the same size as the subject is in real life. A good way to think about it would be that if you used a 1:1 macro lens on a film camera to shoot a penny then the image of the penny on the film negative would be identical to the penny in real life. The same idea applies with digital but it gets a bit fuzzy when you're talking 1s and 0s instead of an actual picture on a negative. 

Anyway, a few of these shots will look familiar. Anyone with a macro has probably taken a close up of a petunia. I did that but also wanted to show an extreme close up view of some plants grown not for their aesthetics. Enjoy!


Bell Pepper 


Tomato Blossom


Begonia


Cilantro 


Tiger Ganzania


Another Tiger Ganzania


French Marigold


Fuscia


Jalapeño Blossom


Jalapeño Emerging


Petunia


Another Petunia


Squash Blossom


Strawberry Blossom


A Strawberry On The Vine


Zucchini Blossom


Wednesday, May 29, 2013

Earthbox Number 7!

I received my 7th Earthbox today thanks to the fine people at Earthbox's Facebook page.


Earthbox is running a photo contest and surprise surprise, the weekly prize is a free Earthbox planter. I've got three Ambrosia Cantaloupe seedlings ready and the plan is to get the planter up and running over the weekend.

I'll have a post with step by step instructions on the Earthbox soon. In the meantime, thanks for reading!

Tuesday, May 28, 2013

And so it begins...

Some good news and bad news on the gardening front. First, the good news. For the second night in a row we had fresh sautéed zucchini for dinner. It's looking like we will have squash by the end of the week and I'm hopeful that at least our Early Girl Tomatoes will be ready soon.

Now for the bad news...
 
It appears that the neighborhood aphids have taken up residence in one of my tomato Earthboxes. I'm exploring options  and will of course post results. 

Monday, May 27, 2013

The Earthbox, My Container of Choice

One of the first things I purchased when I began my back porch garden was an Earthbox. I purchased it after a bit of research and it has turned out to be one of the best investments I've made.


The Earthbox is a Sub-Irrigated Planter or SIP. There are a number of SIPs commercially available from a variety of different manufactures. There is of course the aforementioned Earthbox as well as the City Pickers Patio Garden, Growbox from Garden Patch, Growums Garden Kit and the FEJÖ from Ikea.

All SIPs feature a reservoir chamber at the bottom of the planter that is filled with water through a tube, plastic pipe or other opening. The water is then soaks or wicks upward into the soil through capillary action. The chamber features an overflow hole which prevents over-watering making the planter pretty much fool proof. As long as you fill the reservoir full each day then it is practically impossible to over or under water your plants.

With the exception of the Fejö which is designed for houseplants, all of the SIPs are meant for vegetable or herb gardening. Depending on the size of the plant, most of the SIPs listed above will hold from 2 plants (tomatoes, eggplant, squash, etc) to 16 (carrots, radishes, corn, etc). Their size coupled with their tremendous yield allow a back porch gardener to grow a nice variety of vegetables in just a few boxes. No you're not going to outgrow someone with an acre garden but if you have a few square feet to spare on a patio or deck then you could provide plenty of tomatoes or zucchini for your family over the summer and maybe have a few spare to give away to a neighbor.

The Earthbox has some additional features which made me choose it over the other available planters. The Earthbox ships with a plastic mulch cover that fits snugly over the planter which keeps the soil from drying out too quickly as well as prevent weeds from taking root. I've used Earthboxes for a season and a half at this point and I've yet to have to pick a single weed form any of them.

Earthboxes also have available casters which make them easy to move around. I have a fairly large back deck so I spread my planters around to give each one space but I can at a moments notice roll them all into a corner allowing access to the majority of my deck.


Earthboxes can be sold as a planter only or in a ready-to-grow kit complete with pre-measured packets of fertilizer and dolomite as well as casters and a bag of soil. They are available through many local garden supply stores as well as from Amazon and the Earthbox online store. A planter only kit is only a $33 investment, whereas a ready-to-grow packager will run about $55 for regular fertilizer and $60 for organic fertilizer. 

You will see me mention the Earthbox frequently though the course of this blog. It is a product I can without any hesitation wholeheartedly recommend. This is not meant as a slight to any of the other brand SIPs. I actually look forward to trying one fo them out at sometime in the future. For the moment however, most of my vegetables will find their home in an Earthbox.